Bringing Your Code to the Streets

— or How to Be a Street VJ
Our amazing world of web code is escaping out of the browser at an alarming rate and appearing in every aspect of the environment around us. Over the past few years we’ve already seen JavaScript used server-side, hardware coded with JavaScript, a rise of native style and desktop apps created with HTML, CSS and JavaScript, and even virtual reality (VR) is getting its fair share of front-end goodness.
You can go ahead and play with JavaScript-powered hardware such as the Tessel or the Espruino to name a couple. Just check out the Tessel project page to see JavaScript in the world of coffee roasting or sleep tracking your pet. With the rise of the internet of things, JavaScript can be seen collecting information on flooding among other things. And if that’s not enough ‘outside the browser’ implementations, Node.js servers can even be found in aircraft!
I previously mentioned VR and with three.js’s extra StereoEffect.js module it’s relatively simple to get browser 3D goodness to be Google Cardboard-ready, and thus set the stage for all things JavaScript and VR. It’s been pretty popular in the art world too, with interactive works such as Seb Lee-Delisle’s Lunar Trails installation, featuring the old arcade game Lunar Lander, which you can now play in your browser while others watch (it is the web after all). The Science Museum in London held Chrome Web Lab, an interactive exhibition featuring five experiments, showcasing the magic of the web. And it’s not even the connectivity of the web that’s being showcased; we can even take things offline and use web code for amazing things, such as fighting Ebola.
One thing is for sure, JavaScript is awesome. Hell, if you believe those telly programs (as we all do), JavaScript can even take down the stock market, purely through the witchcraft of canvas! Go JavaScript!
Now it’s our turn
So I wanted to create a little project influenced by this theme, and as it’s Christmas, take it to the streets for a little bit of party fun! Something that could take code anywhere. Here’s how I made a portable visual projection pack, a piece of video mixing software and created some web-coded street art.
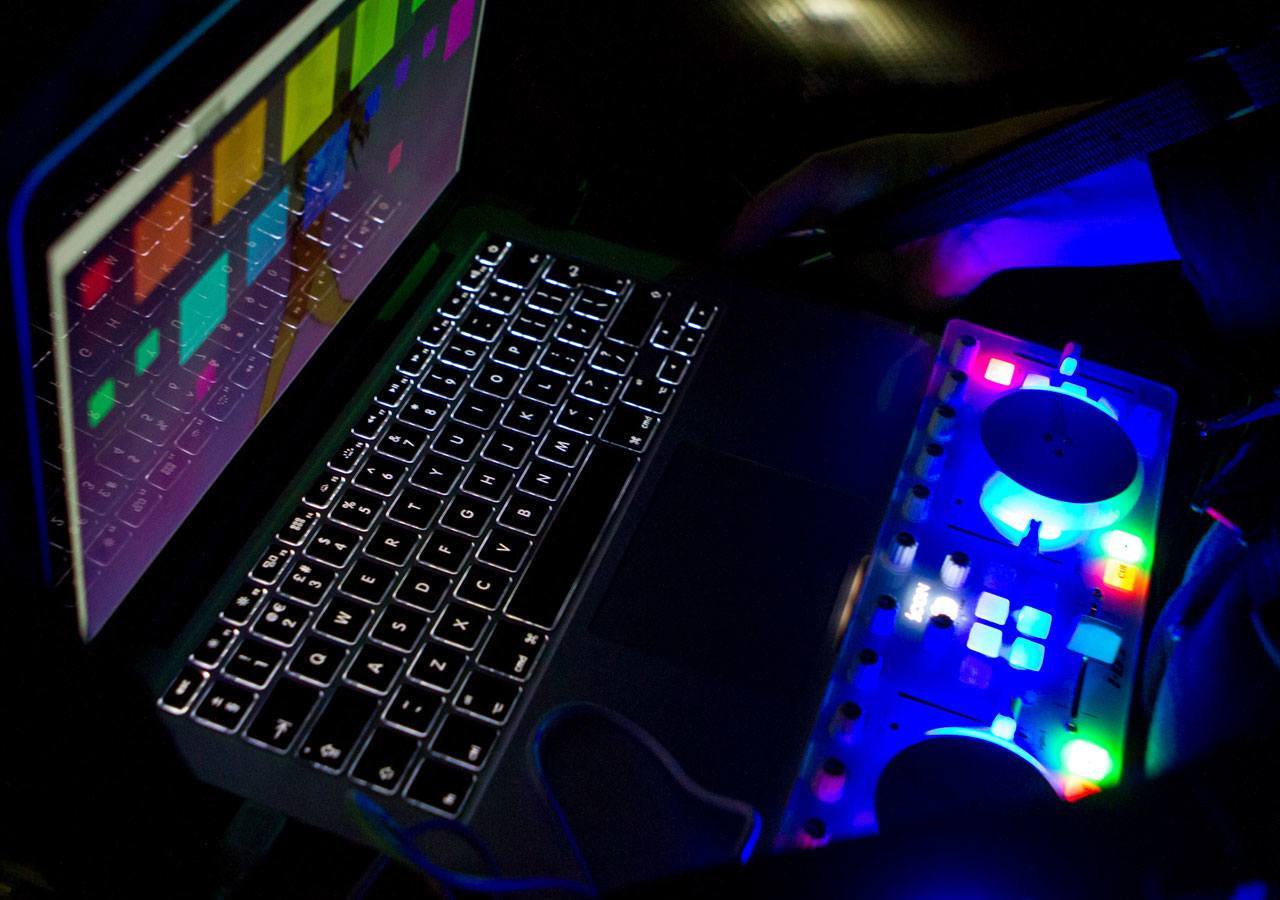
Step one: The equipment
You will need:
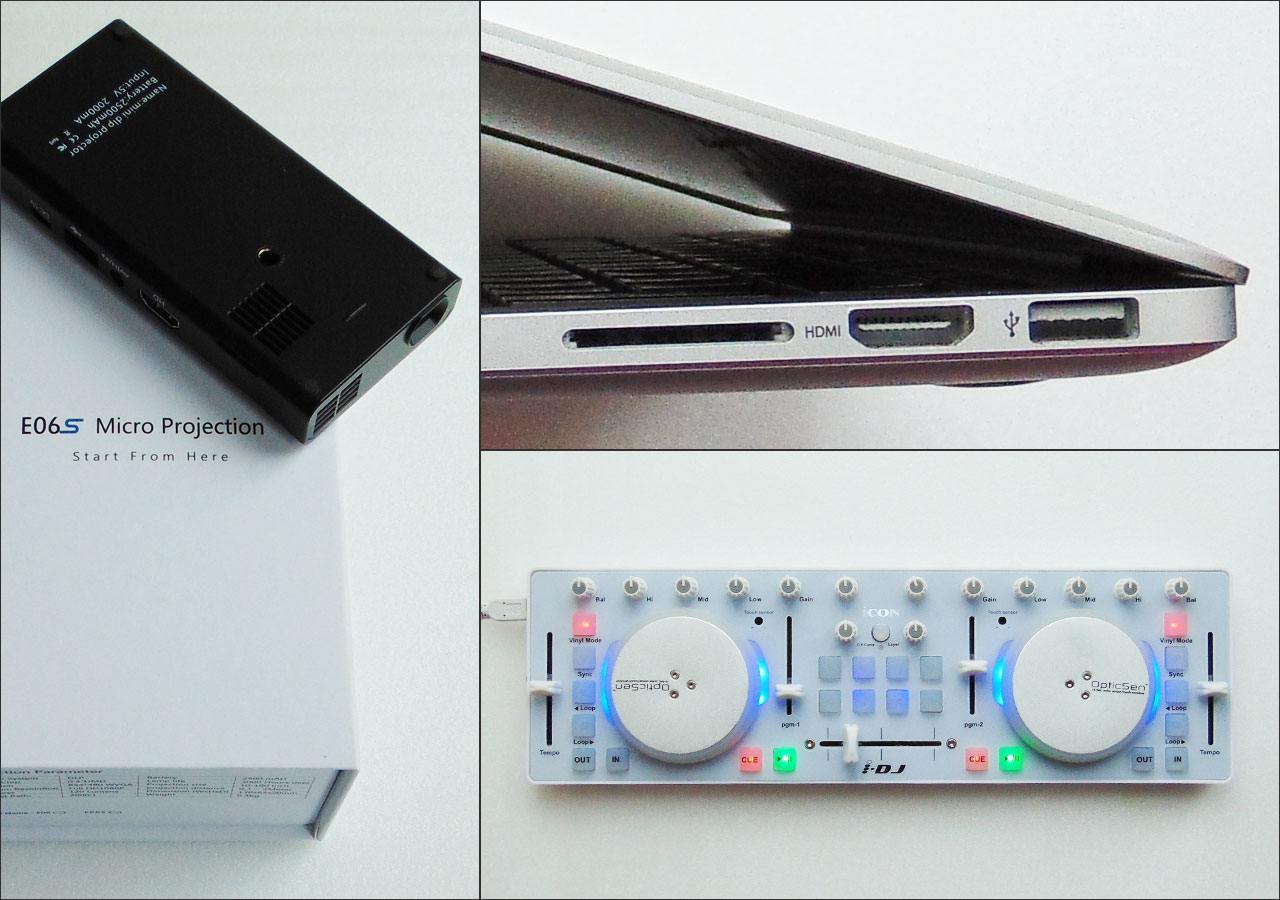
- One laptop: with HDMI output and a modern browser installed, such as Google Chrome.
- One battery-powered mini projector: I’ve used a Texas Instruments DLP; for its 120 lumens it was the best cost-to-lumens ratio I could find.
- One MIDI controller (optional): mine is an ICON iDJ as it suits mixing visuals. However, there is more affordable hardware on the market such as an Akai LPD8 or a Korg nanoPAD2. As you’ll see in the article, this is optional as it can be emulated within the software.
- A case to carry it all around in.
Step two: The software
The projected visuals, I imagined, could be anything you can create within a browser, whether that be simple HTML and CSS, images, videos, SVG or canvas. The only requirement I have is that they move or change with sound and that I can mix any one visual into another.
You may remember a couple of years ago I created a demo on this very site, allowing audio-triggered visuals from the ambient sounds your device mic was picking up. That was a great starting point – I used that exact method to pick up the audio and thus the first requirement was complete. If you want to see some more examples of visuals I’ve put together for this, there’s a showcase on CodePen.
The second requirement took a little more thought. I needed two screens, which could at any point show any of the visuals I had coded, but could be mixed from one into the other and back again. So let’s start with two divs, both absolutely positioned so they’re on top of each other, but at the start the second screen’s opacity is set to zero.
Now all we need is a slider, which when moved from one side to the other slowly sets the second screen’s opacity to 1, thereby fading it in.
See the Pen Mixing Screens (Software Version) by Rumyra (@Rumyra) on CodePen.
As you saw above, I have a MIDI controller and although the software method works great, I’d quite like to make use of this nifty piece of kit. That’s easily done with the Web MIDI API. All I need to do is call it, and when I move one of the sliders on the controller (I’ve allocated the big cross fader in the middle for this), pick up on the change of value and use that to control the opacity instead.
var midi, data;
// start talking to MIDI controller
if (navigator.requestMIDIAccess) {
  navigator.requestMIDIAccess({
    sysex: false
  }).then(onMIDISuccess, onMIDIFailure);
} else {
  alert(“No MIDI support in your browser.”);
}

// on success
function onMIDISuccess(midiData) {
  // this is all our MIDI data
  midi = midiData;

  var allInputs = midi.allInputs.values();
  // loop over all available inputs and listen for any MIDI input
  for (var input = allInputs.next(); input && !input.done; input = allInputs.next()) {
    // when a MIDI value is received call the onMIDIMessage function
    input.value.onmidimessage = onMIDIMessage;
  }
}

function onMIDIMessage(message) {
  // data comes in the form [command/channel, note, velocity]
  data = message.data;

  // Opacity change for screen. The cross fader values are [176, 8, {0-127}]
  if ( (data[0] === 176) && (data[1] === 8) ) {
    // this value will change as the fader is moved
    var opacity = data[2]/127;
    screenTwo.style.opacity = opacity;
  }
}
The final code was slightly more complicated than this, as I decided to switch the two screens based on the frequencies of the sound that was playing, and use the cross fader to depict the frequency threshold value. This meant they flickered in and out of each other, rather than just faded. There’s a very rough-and-ready first version of the software on GitHub.
Phew, Great! Now we need to get all this to the streets!
Step three: Portable kit
Did you notice how I mentioned a case to carry it all around in? I wanted the case to be morphable, so I could use the equipment from it too, a sort of bag-to-usherette-tray-type affair. Well, I had an unused laptop bag…
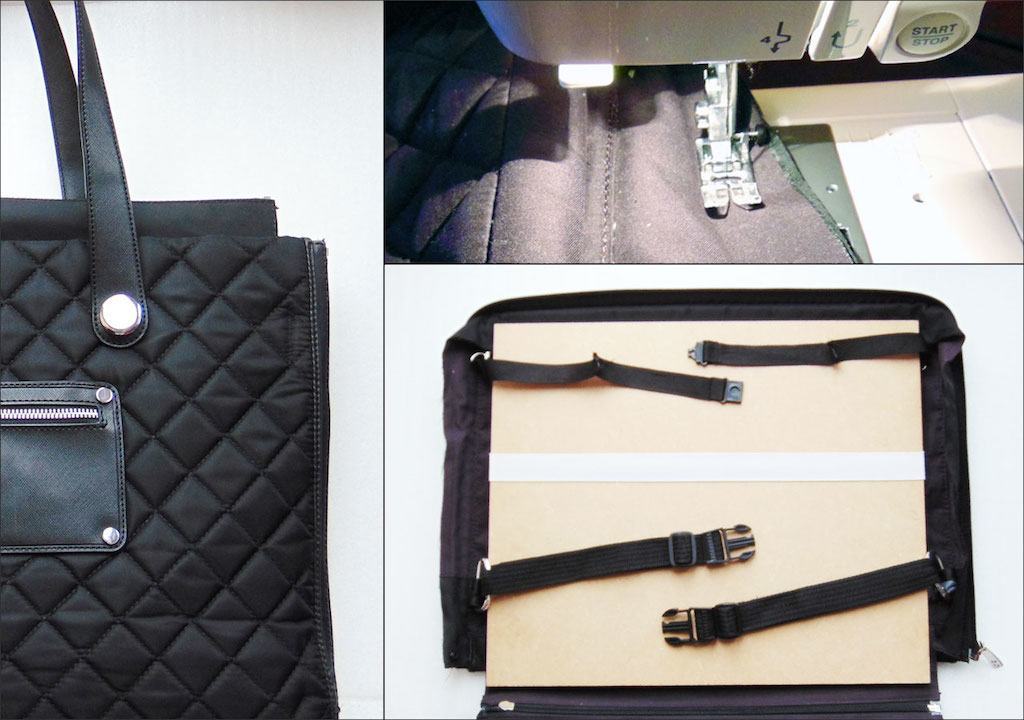
I strengthened it with some MDF, so when I opened the bag it would hold like a tray where the laptop and MIDI controller would sit. The projector was Velcroed to the external pocket of the bag, so when it was a tray it would project from underneath. I added two durable straps, one for my shoulders and one round my waist, both attached to the bag itself. There was a lot of cutting and trimming. As it was a laptop bag it was pretty thick to start and sewing was tricky. However, I only broke one sewing machine needle; I’ve been known to break more working with leather, so I figured I was doing well. By the way, you can actually buy usherette trays, but I just couldn’t resist hacking my own :)
Step four: Take to the streets
First, make sure everything is charged – everything – a lot! The laptop has to power both the MIDI controller and the projector, and although I have a mobile phone battery booster pack, that’ll only charge the projector should it run out. I estimated I could get a good hour of visual artistry before I needed to worry, though.
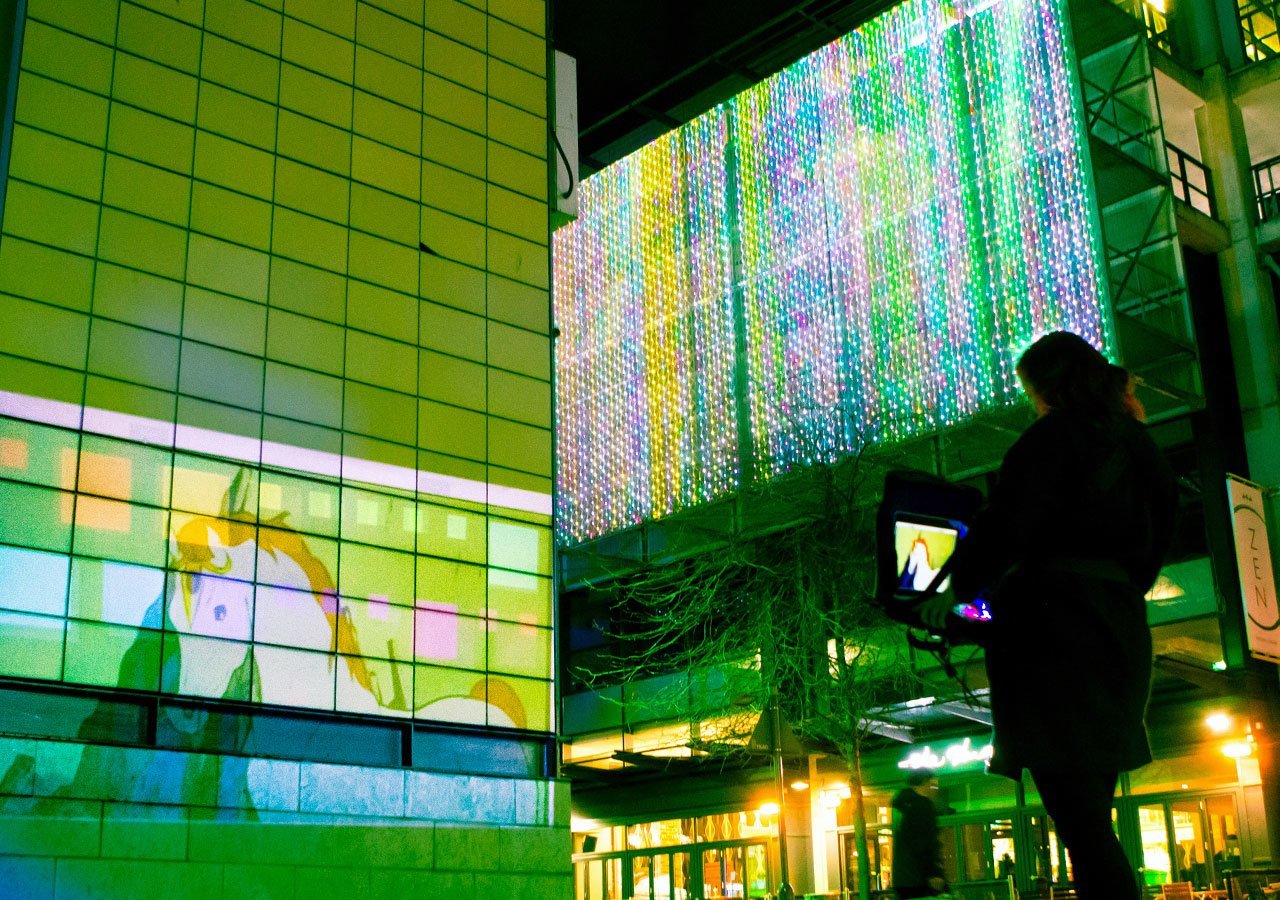
I had a couple of ideas about time of day and location. Here in the UK at this time of year, it gets dark around half past four, so I could easily head out in a city around 5pm and it would be dark enough for the projections to be seen pretty well. I chose Bristol, around the waterfront, as there were some interesting locations to try it out in. The best was Millennium Square: busy but not crowded and plenty of surfaces to try projecting on to.
My first time out with the portable audio/visual pack (PAVP as it will now be named) was brilliant. I played music and projected visuals, like a one-woman band of A/V!
You might be thinking what the point of this was, besides, of course, it being a bit of fun. Well, this project got me to look at canvas and SVG more closely. The Web MIDI API was really interesting; MIDI as a data format has some great practical uses. I think without our side projects we may not have all these wonderful uses for our everyday code. Not only do they remind us coding can, and should, be fun, they also help us learn and grow as makers.
My favourite part? When I was projecting into a water feature in Millennium Square. For those who are familiar, you’ll know it’s like a wall of water so it produced a superb effect. I drew quite a crowd and a kid came to stand next to me and all I could hear him say with enthusiasm was, ‘Oh wow! That’s so cool!’
Yes… yes, kid, it was cool. Making things with code is cool.
Massive thanks to the lovely Drew McLellan for his incredibly well-directed photography, and also Simon Johnson who took a great hand in perfecting the kit while it was attached.
About the author
Ruth John is an award nominated digital artist, web consultant, keynote speaker and writer, with 15 years of experience in the digital industry.
She’s a Google Developer Expert, is on the board of directors for Bath Digital Festival and in her career has worked for companies such as o2 (Telefonica) and BSkyB, and clients such as the BBC, NBC, Cancer Research UK, Heineken and Channel 4 among others.
Ruth also belongs to the { Live : JS } collective, which brings audio and visual code to life, in live performances across the globe
Brought to you by
Related articles
-
Five Interesting Ways to Use Array.reduce() (And One Boring Way)
Chris Ferdinandi turns the heat down low and lets the sauce reduce while we take a look at how to add spice to our source with a sprinkling of Array.reduce(). Just a little ingenuity with the humblest of functions.
-
Mistletoe Offline
Jeremy Keith reminds us that 4G is king. The carollers sing. One tunnel has passed, a new one’s beginning. Dreams of wi-fi on the go. Fingers numb, smart phones aglow. It’s Christmas time, mistletoe offline. Children streaming their gameplay online. With batteries on fire and gigabytes for free, it’s time to rejoice in connectivity.
-
Taking Device Orientation for a Spin
Drew McLellan wraps up our 2016 season with a look at the HTML5 Device Orientation API and how an annoying physical interaction can become an annoying virtual one. Like the silver sixpence in your figgy pudding, there’s treasure to be found in our browsers, so dig in.
-
Teach the CLI to Talk Back
Anna Debenham sets out to humanise our interactions with the command line to put more of the user into the user interface. Like an injured hedgehog in the winter snow, sometimes we can all benefit from interacting with a human.
-
The Art of Mathematics: A Mandala Maker Tutorial
Hagar Shilo breaks out the Christmas decorations with a tutorial to show how a little knowledge of JavaScript can lead to impressive results. Forget about the doilies and fake snow on the windows, all we need to create geometric patterns is a web browser and a sprinkling of mathematics.
-
How Tabs Should Work
Remy Sharp picks that old chestnut – tabs – and roasts it afresh on the open fire of JavaScript to see how a fully navigable, accessible and clickable set of tabs can work. Everybody knows some scripting and some CSS can help to make your website bright. Although it’s been said many times, many ways, please be careful to do it right.