Optimize Your Web Design Workflow

I’m not sure about you, but I still favour using Photoshop to create my designs for the web. I agree that this application, even with its never-ending feature set, is not the perfect environment to design websites in. The ideal application doesn’t exist yet, however, so until it does it’s maybe not such a bad idea to investigate ways to optimize our workflow.
Why use Photoshop?
It will probably not come as a surprise if I say that Photoshop and Illustrator are the applications that I know best and feel most comfortable and creative in. Some people prefer Fireworks for web design. Even though I understand people’s motivations, I still prefer Photoshop personally. On the occasions that I gave Fireworks a try, I ended up just using the application to export my images as slices, or to prepare a dummy for the client. For some reason, I’ve never been able to find my way in that app. There were always certain things missing that could only be done in either Photoshop or Illustrator, which bothered me.
Why not start in the browser?
These days, with CSS3 styling emerging, there are people who find it more efficient to design in the browser. I agree that at a certain point, once the basic design is all set and defined, you can jump right into the code and go from there. But the actual creative part, at least for me, needs to be done in an application such as Photoshop.
As a designer I need to be able to create and experiment with shapes on the fly, draw things, move them around, change colours, gradients, effects, and so on. I can’t see me doing this with code. I’m sure if I switch to markup too quickly, I might end up with a rather boxy and less interesting design. Once I start playing with markup, I leave my typical ‘design zone’. My brain starts thinking differently – more rational and practical, if you know what I mean; I start to structure and analyse how to mark up my design in the most efficient semantic way. When I design, I tend to let that go for a bit. I think more freely and not so much about the limitations, as it might hinder my creativity. Now that you know my motivations to stick with Photoshop for the time being, let’s see how we can optimize this beast.
Optimize your Photoshop workspace
In Photoshop CS5 you have a few default workspace options to choose from which can be found at the top right in the Application Bar (Window > Application Bar).

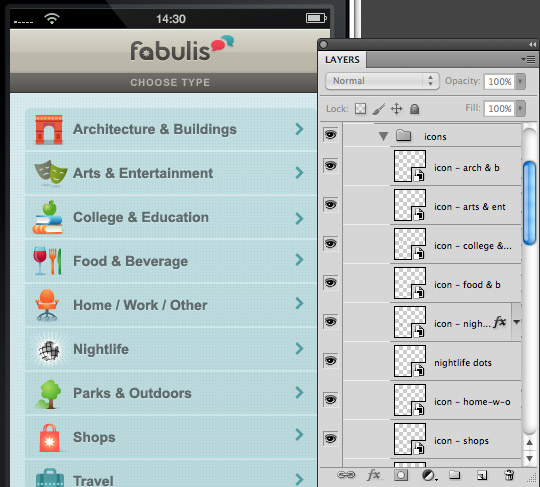
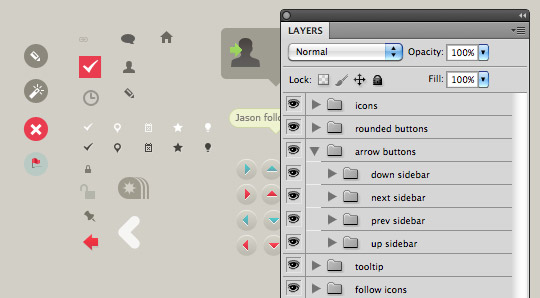
You can set up your panels and palettes the way you want, starting from the ‘Design’ workspace option, and save this workspace for future web work. Here is how I have set up things for when I work on a website design:
I have the layers palette open, and I keep the other palettes collapsed. Sometimes, when space permits, I open them all. For designers who work both on print and web, I think it’s worthwhile to save a workspace for both, or for when you’re doing photo retouching.
Set up a grid
When you work a lot with Shape Layers like I do, it’s really helpful to enable the Grid (View > Show > Grid) in combination with Snap to Grid (View > Snap To > Grid). This way, your vector-based work will be pixel-sharp, as it will always snap to the grid, and so you don’t end up with blurry borders.
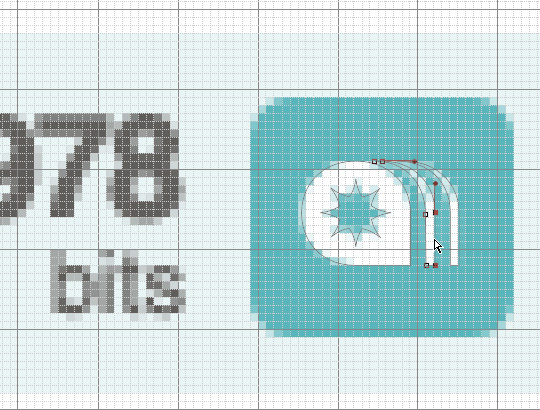
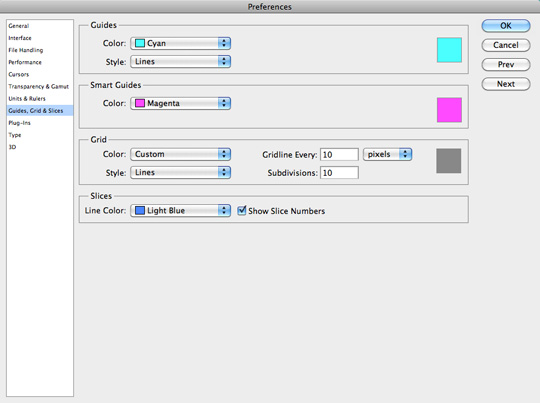
To set up your preferred grid, go to Preferences > Guides, Grids and Slices. A good setting is to use ‘Gridline Every 10 pixels’ and ‘Subdivision 10’. You can switch it on and off at any time using the shortcut Cmd/Ctrl + ’.
It might also help to turn on Smart Guides (View > Show > Smart Guides).
Another important tip for making sure your Shape Layer boxes and other shapes are perfectly aligned to the pixel grid when you draw them is to enable Snap to Pixels. This option can be enabled in the Application bar in the Geometry options dropdown menu when you select one of the shape tools from the toolbox.
![]()
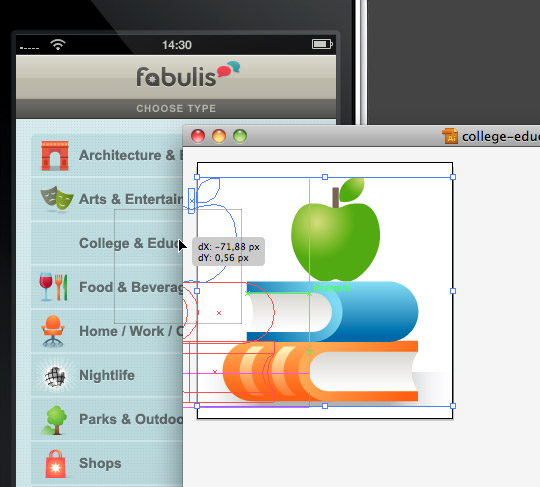
Use Shape Layers
To keep your design as flexible as possible, it’s a good thing to use Shape Layers wherever you can as they are scalable. I use them when I design for the iPhone. All my icons, buttons, backgrounds, illustrative graphics – they are all either Smart Objects placed from Illustrator, or Shape Layers. This way, the design is scalable for the retina display.
Use Smart Objects
Among the things I like a lot in Photoshop are Smart Objects. Smart Objects preserve an image’s source content with all its original characteristics, enabling you to perform non-destructive editing to the layer. For me, this is the ideal way of making my design flexible.
For example, a lot of elements are created in Illustrator and are purely vector-based. Placing these elements in Photoshop as Smart Objects (via copy and paste, or dragging from Illustrator into Photoshop) will keep them vector-based and scalable at all times without loss of quality.
Another way you could use Smart Objects is whenever you have repeating elements; for example, if you have a stream or list of repeating items. You could, for instance, create one, two or three different items (for the sake of randomness), make each one a Smart Object, and repeat them to create the list. Then, when you have to update, you need only change the Smart Object, and the update will be automatically applied in all its linked instances.
Turning photos into Smart Objects before you resize them is also worth considering – you never know when you’ll need that same photo just a bit bigger. It keeps things more flexible, as you leave room to resize the image at a later stage. I use this in combination with the Smart Filters a lot, as it gives me such great flexibility.
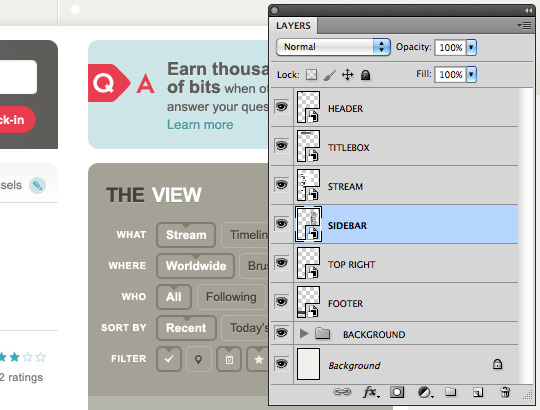
I usually use Smart Objects as well for the main sections of a web page, which are repeated across different pages of a site. So, for elements such as the header, footer and sidebar, it can be handy for bigger projects that are constantly evolving, where you have to create a lot of different pages in Photoshop.
You could save a template page that has the main sections set up as Smart Objects, always in their latest version. Each time you need to create new page, you can start from that template file. If you need to update an existing page because the footer (or sidebar, or header) has been updated, you can drag the updated Smart Object into this page. Although, do I wish Photoshop made it possible to have Smart Objects live as separate files, which are then linked to my different pages. Then, whenever I update the Smart Object, the pages are automatically updated next time I open the file. This is how linked files work in InDesign and Illustrator when you place a external image.
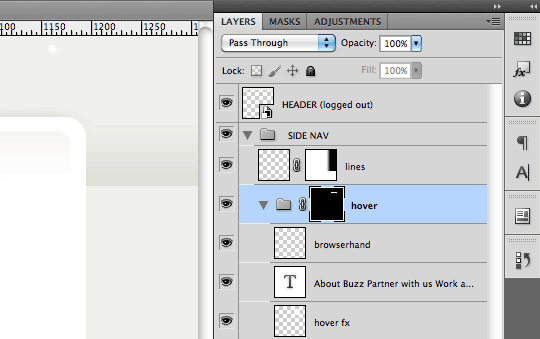
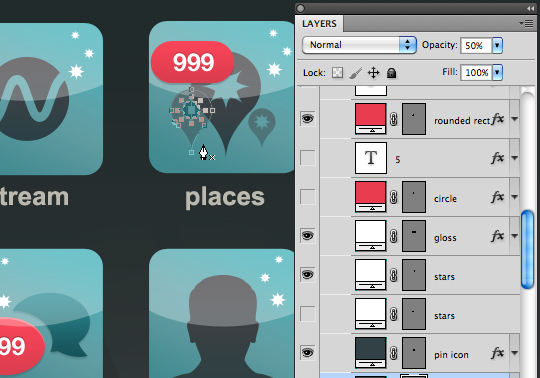
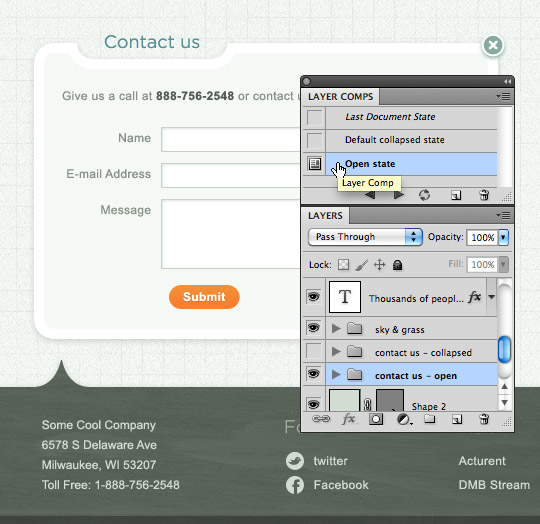
Use Layer Comps
In some situations, using Layer Comps can come in handy. I try to use them when the design consists of different states; for example, if there are hidden and show states of certain content, such as when content is shown after clicking a certain button. It can be useful to create a Layer Comp for each state. So, when you switch between the two Layer Comps, you’re switching between the two states.
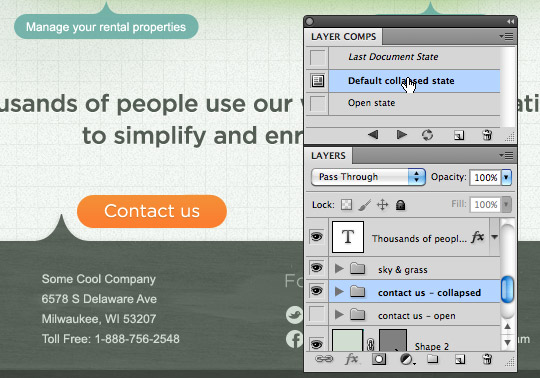
It’s OK to move or hide content in each of these states, as well as apply different layer styles. I find this particularly useful when I need to save separate JPEG versions of each state to show to the client, instead of going over all the eye icons in the layers palette to turn the layers’ visibility on or off.
Create a set of custom colour swatches
I tend to use a distinct colour Swatches palette for each project I work on, by saving a separate Swatches palette in project’s folder (as an .ase file). You can do this through the palette’s dropdown menu, choosing Save Swatches for Exchange.
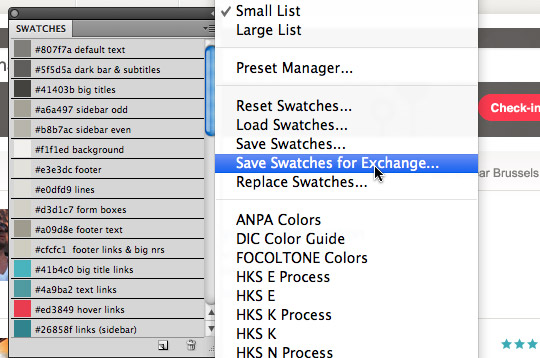
Selecting this option gives you the flexibility to load this palette in other Adobe applications like Illustrator, InDesign or Fireworks. This way, you have the colours of any particular project at hand. I name each colour, using the hexadecimal values.
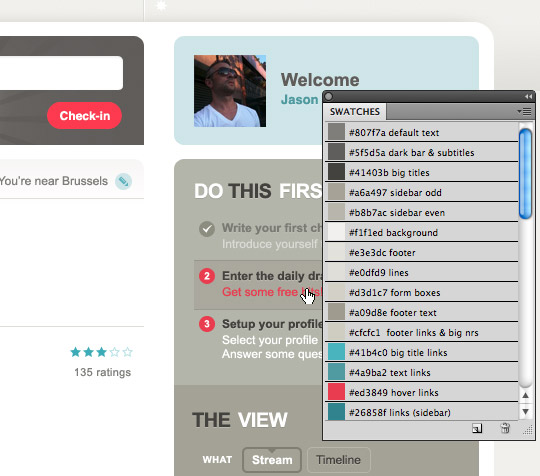
Loading, saving or changing the view of the Swatches palette can be done via the palette’s dropdown menu. My preferred view is ‘Small List’ so I can see the hexadecimal values or other info I have added in the description.
I do wish Photoshop had the option of loading several different Styles palettes, so I could have two or more of them open at the same time, but each as a separate palette. This would be handy whenever I switch to another project, as I’m usually working on more than one project in a day. At the moment, you can only add a set of colours to the palette that is already open, which is frustrating and inefficient if you need to update the palette of a project separately.
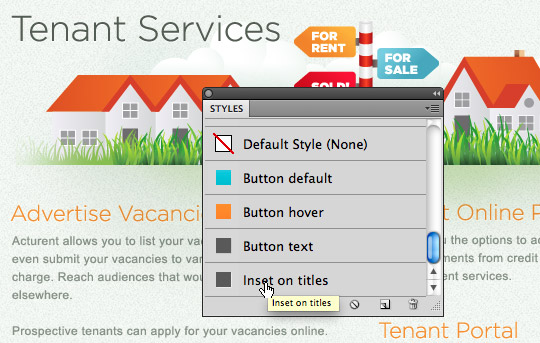
Create a set of custom Styles
Just like saving a Swatches palette, I also always save the styles I apply in the Styles palette as a separate Styles file in the project’s folder when I work on a website design or design for iPhone/iPad. During the design process, I can save it each time styles are added. Again, though, it would be great if we could have different Styles palettes open at the same time.
Use a scratch file
What I also find particularly timesaving, when working on a large project, is using some kind of scratch file. By that, I mean a file that has elements in place that you reuse a lot in the general design. Think of buttons, icons and so on, that you need in every page or screen design. This is great for both web design work and iPad/iPhone work.
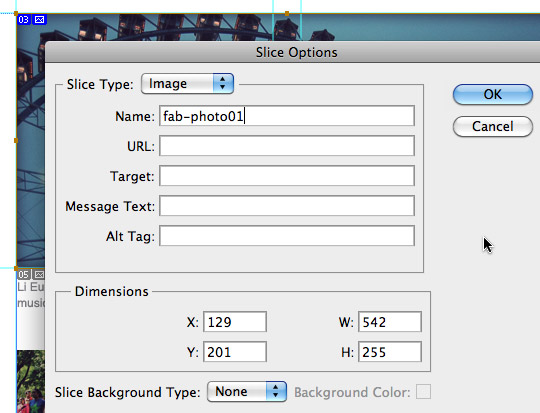
Use the slice tool
This might not be something you think of at first, because you probably associate this way of working with ‘old-school’ table-based techniques. Still, you can apply your slice any way you want, keeping your way of working in mind. Just think about it for a second. If you use the slice tool, and you give each slice its proper filename, you don’t have to worry about it when you need to do updates on the slice or image. Photoshop will remember what the image of that slice is called and which ‘Save for Web’ export settings you’ve used for it. You can also export multiple slices all at once, or export only the ones you need using ‘Save selected slices’.
I hope this list of optimization tips was useful, and that they will help you improve and enjoy your time in Photoshop. That is, until the ultimate web design application makes its appearance. Somebody is building this as we speak, right?
About the author
Veerle Pieters is a graphic/web designer based in Deinze, Belgium. Starting in ’92 as a freelance graphic designer, Veerle worked on print design before focussing more on webdesign and GUI (since ’96). She runs her own design studio Duoh! together with Geert Leyseele. Veerle has been blogging since 2003 and is considered number 39 on the list of “NxE’s Fifty Most Influential ‘Female’ Bloggers“.
Brought to you by
Related articles
-
Care and Feeding of Burnout
Jessica Rose sets out her recipe for identifying and caring for the symptoms of professional burnout. This time of year is the perfect opportunity to pause and reflect – are you burning the advent candle at both ends, and if so, what should you do about it? Let’s find out.
-
Want to Break Out of Comparison Syndrome? Do a Media Detox
Denise Jacobs hits pause on the avalanche of social media posts, harnesses up her huskies and rides a sled of serenity to a calm mountaintop. When working online we’re always connected, but is that for the best? Perhaps it’s time to step back.
-
Knowing the Future - Tips for a Happy Launch Day
Phil Hawksworth dashes through the snow towards his launch deadline with some tips for easing the path to production. Going live can be a scary thing, but that shouldn’t be down to technical concerns.Nail your deployment early, don’t leave it to the night before Christmas.
-
Surviving—and Thriving—as a Remote Worker
Mel Choyce harnesses the huskies of hard toil to the sled of flexibility to slide off to a location of her own choosing. In a time when it makes less sense than ever to all be cooped in the same room staring at our magical screens, Mel offers up words of wisdom on how to survive, nay, thrive out there on your own.
-
What I Learned in Six Years at GDS
Anna Shipman looks back across the wintery landscape to her time spent working on the UK’s Government Digital Service. Like the busy elves in Santa’s workshop, government digital workers toil tirelessly for the benefit of people everywhere. The very best of them, however, also share their blueprints.
-
What Is Vagrant and Why Should I Care?
Darren Beale explains how Vagrant can fit in to existing development workflows and bring many benefits to those of us maintaining multiple virtual development environments. Set and forget – a gift that keeps on giving.