An Overview of SVG Sprite Creation Techniques

SVG can be used as an icon system to replace icon fonts. The reasons why SVG makes for a superior icon system are numerous, but we won’t be going over them in this article. If you don’t use SVG icons and are interested in knowing why you may want to use them, I recommend you check out “Inline SVG vs Icon Fonts” by Chris Coyier – it covers the most important aspects of both systems and compares them with each other to help you make a better decision about which system to choose.
Once you’ve made the decision to use SVG instead of icon fonts, you’ll need to think of the best way to optimise the delivery of your icons, and ways to make the creation and use of icons faster.
Just like bitmaps, we can create image sprites with SVG – they don’t look or work exactly alike, but the basic concept is pretty much the same.
There are several ways to create SVG sprites, and this article will give you an overview of three of them. While we’re at it, we’re going to take a look at some of the available tools used to automate sprite creation and fallback for us.
Prerequisites
The content of this article assumes you are familiar with SVG. If you’ve never worked with SVG before, you may want to look at some of the introductory tutorials covering SVG syntax, structure and embedding techniques. I recommend the following:
- SVG basics: Using SVG.
- Structure: Structuring, Grouping, and Referencing in SVG — The
<g>,<use>,<defs>and<symbol>Elements. We’ll mention<use>and<symbol>quite a bit in this article. - Embedding techniques: Styling and Animating SVGs with CSS. The article covers several topics, but the section linked focuses on embedding techniques.
- A compendium of SVG resources compiled by Chris Coyier — contains resources to almost every aspect of SVG you might be interested in.
And if you’re completely new to the concept of spriting, Chris Coyier’s CSS Sprites explains all about them.
Another important SVG feature is the viewBox attribute. For some of the techniques, knowing your way around this attribute is not required, but it’s definitely more useful if you understand – even if just vaguely – how it works. The last technique mentioned in the article requires that you do know the attribute’s syntax and how to use it. To learn all about viewBox, you can refer to my blog post about SVG coordinate systems.
With the prerequisites in place, let’s move on to spriting SVGs!
Before you sprite…
In order to create an SVG sprite with your icons, you’ll of course need to have these icons ready for use.
Some spriting tools require that you place your icons in a folder to which a certain spriting process is to be applied. As such, for all of the upcoming sections we’ll work on the assumption that our SVG icons are placed in a folder named SVG.
Each icon is an individual .svg file.
You’ll need to make sure each icon is well-prepared and optimised for use – make sure you’ve cleaned up the code by running it through one of the optimisation tools or processes available (or doing it manually if it’s not tedious).
After prepping the icon files and placing them in a folder, we’re ready to create our SVG sprite.
HTML inline SVG sprites
Since SVG is XML code, it can be embedded inline in an HTML document as a code island using the <svg> element. Chris Coyier wrote about this technique first on CSS-Tricks.
The embedded SVG will serve as a container for our icons and is going to be the actual sprite we’re going to use. So we’ll start by including the SVG in our document.
<!DOCTYPE html>
<!-- HTML document stuff -->

<svg style="display:none;">
  <!-- icons here -->
</svg>

<!-- other document stuff -->
</html>
Next, we’re going to place the icons inside the <svg>. Each icon will be wrapped in a <symbol> element we can then reference and use elsewhere in the page using the SVG <use> element. The <symbol> element has many benefits, and we’re using it because it allows us to define a symbol (which is a convenient markup for an icon) without rendering that symbol on the screen. The elements defined inside <symbol> will only be rendered when they are referenced – or called – by the <use> element.
Moreover, <symbol> can have its own viewBox attribute, which makes it possible to control the positioning of its content inside its container at any time.
Before we move on, I’d like to shed some light on the style="display:none;" part of the snippet above. Without setting the display of the SVG to none, and even though its contents are not rendered on the page, the SVG will still take up space in the page, resulting in a big empty area. In order to avoid that, we’re hiding the SVG entirely with CSS.
Now, suppose we have a Twitter icon in the icons folder. twitter.svg might look something like this:
<!-- twitter.svg -->
<?xml version="1.0" encoding="utf-8"?>
<!DOCTYPE svg PUBLIC "-//W3C//DTD SVG 1.1//EN" "http://www.w3.org/Graphics/SVG/1.1/DTD/svg11.dtd">
<svg version="1.1" xmlns="http://www.w3.org/2000/svg" xmlns:xlink="http://www.w3.org/1999/xlink" width="32" height="32" viewBox="0 0 32 32">
<path d="M32 6.076c-1.177 0.522-2.443 0.875-3.771 1.034 1.355-0.813 2.396-2.099 2.887-3.632-1.269 0.752-2.674 1.299-4.169 1.593-1.198-1.276-2.904-2.073-4.792-2.073-3.626 0-6.565 2.939-6.565 6.565 0 0.515 0.058 1.016 0.17 1.496-5.456-0.274-10.294-2.888-13.532-6.86-0.565 0.97-0.889 2.097-0.889 3.301 0 2.278 1.159 4.287 2.921 5.465-1.076-0.034-2.088-0.329-2.974-0.821-0.001 0.027-0.001 0.055-0.001 0.083 0 3.181 2.263 5.834 5.266 6.437-0.551 0.15-1.131 0.23-1.73 0.23-0.423 0-0.834-0.041-1.235-0.118 0.835 2.608 3.26 4.506 6.133 4.559-2.247 1.761-5.078 2.81-8.154 2.81-0.53 0-1.052-0.031-1.566-0.092 2.905 1.863 6.356 2.95 10.064 2.95 12.076 0 18.679-10.004 18.679-18.68 0-0.285-0.006-0.568-0.019-0.849 1.283-0.926 2.396-2.082 3.276-3.398z" fill="#000000"></path>
</svg>
We don’t need the root svg element, so we’ll strip the code and only keep the parts that make up the Twitter icon’s shape, which in this example is just the <path> element.Let’s drop that into the sprite container like so:
<svg style="display:none;">
  <symbol id="twitter-icon" viewBox="0 0 32 32">
    <path d="M32 6.076c-1.177 …" fill="#000000"></path>
  </symbol>

 <!-- remaining icons here -->
  <symbol id="instagram-icon" viewBox="0 0 32 32">
   <!-- icon contents -->
  </symbol>

  <!-- etc. -->
</svg>
Repeat for the other icons.
The value of the <symbol> element’s viewBox attribute depends on the size of the SVG. You don’t need to know how the viewBox works to use it in this case. Its value is made up of four parts: the first two will almost always be “0 0”; the second two will be equal to the size of the icon. For example, our Twitter icon is 32px by 32px (see twitter.svg above), so the viewBox value is “0 0 32 32”.
That said, it is certainly useful to understand how the viewBox works – it can help you troubleshoot SVG sometimes and gives you better control over it, allowing you to scale, position and even crop SVGs manually without having to resort to an editor. My blog post explains all about the viewBox attribute and its related attributes.
Once you have your SVG sprite ready, you can display the icons anywhere on the page by referencing them using the SVG <use> element:
<svg class="twitter-icon">
  <use xlink:href="#twitter-icon"></use>
<svg>
And that’s all there is to it!
HTML-inline SVG sprites are simple to create and use, but when you have a lot of icons (and the more icon sets you create) it can easily become daunting if you have to manually transfer the icons into the <svg>. Fortunately, you don’t have to do that. Fabrice Weinberg created a Grunt plugin called grunt-svgstore which takes the icons in your SVG folder and generates the SVG sprites for you; all you have to do is just drop the sprites into your page and use the icons like we did earlier.
This technique works in all browsers supporting SVG. There seems to be a bug in Safari on iOS which causes the icons not to show up when the SVG sprite is defined at the bottom of the document after the <use> references to the icons, so it’s safest to include the sprite before you use the icons until this bug is fixed.
This technique has one disadvantage: the SVG sprite cannot be cached. We’re saving an extra HTTP request here but the browser cannot cache the image, so we aren’t speeding up any subsequent page loads by inlining the SVG. There must be a better way – and there is.
Styling the icons is possible, but getting deep into the styles becomes a bit harder owing to the nature of the contents of the <use> element – these contents are cloned into a shadow DOM, and hence selecting elements in CSS the traditional way is not possible. However, some techniques to work around that do exist, and give us slightly more styling flexibility. Animations work as expected.
Referencing an external SVG sprite in HTML
Instead of including the SVG inline in the document, you can reference the sprite and the icons inside it externally, taking advantage of fragment identifiers to select individual icons in the sprite.
For example, the above reference to the Twitter icon would look something like this instead:
<svg class="twitter-icon">
  <use xlink:href="path/to/icons.svg#twitter-icon"></use>
<svg>
icons.svg is the name of the SVG file that contains all of our icons as symbols, and the fragment identifier #twitter-icon is the reference to the <symbol> wrapping the Twitter icon’s contents. Very convenient, isn’t it? The browser will request the sprite and then cache it, speeding up subsequent page loads. Win!
This technique also works in all browsers supporting SVG except Internet Explorer – not even IE9+ with SVG support permits this technique. No version of IE supports referencing an external SVG in <use>.
Fortunately (again), Jonathan Neil has created a plugin called svg4everybody which fills this gap in IE; you can reference an external sprite in <use> and also provide fallback for browsers that do not support SVG. However, it requires you to have the fallback images (PNG or JPEG, for example) available to do so. For details, refer to the plugin’s Github repository’s readme file.
CSS inline SVG sprites
Another way to create an SVG sprite is by inlining the SVG icons in a style sheet using data URIs, and providing fallback for non-supporting browsers – also within the CSS.
Using this approach, we’re turning the style sheet into the sprite that includes our icons. The style sheet is normally cached by the browser, so we have that concern out of the way.
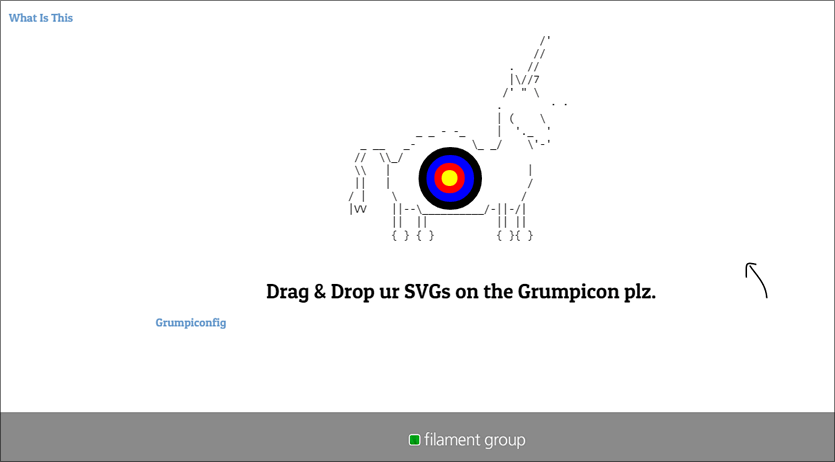
This technique is put into practice in Filament Group’s icon system approach, which uses their Grunticon plugin – or its sister Grumpicon web app – for generating the necessary CSS for the sprite. As such, we’re going to cover this technique by following a workflow that uses one of these tools.
Again, we start with our icon SVG files. To focus on the actual spriting method and not on the tooling, I’ll go over the process of sprite creation using the Grumpicon web app, instead of the Grunticon plugin. Both tools generate the same resources that we’re going to use for the icon system. Whether you choose the web app or the Grunt set-up, after processing your SVG folder you’re going to end up with the same set of resources that we’ll be using throughout this section.
The first step is to drop your icons into the Grumpicon web app.
 Grumpicon homepage screenshot.
The application will then show you a preview of your icons, and a download button will allow you to download the generated files. These files will contain everything you need for your icon system – all that’s left is for you to drop the generated files and code into your project as recommended and you’ll have your sprite and icons ready to use anywhere you want in your page.
Grumpicon generates five files and one folder in the downloaded package: a png folder containing PNG versions of your icons; three style sheets (that we’ll go over briefly); a loader script file; and preview.html which is a live example showing you the other files in action.
The script in the loader goes into the <head> of your page. This script handles browser and feature detection, and requests the necessary style sheet depending on browser support for SVG and base64 data URIs. If you view the source code of the preview page, you can see exactly how the script is added.
icons.data.svg.css is the style sheet that contains your icons – the sprite. The icons are embedded inline inside the style sheet using data URIs, and applied to elements of your choice as background images, using class names. For example:
.twitter-icon{
    background-image: url('data:image/svg+xml;…'); /* the ellipsis is where the icon’s data would go */
    background-repeat: no-repeat;
    background-position: 50% 50%;
    height: 2em;
    width: 2em;
    /* etc. */
}
Then, you only have to apply the twitter-icon class name to an element in your HTML to apply the icon as a background to it:
<span class="twitter-icon"></span>And that’s all you need to do to get an icon on the page.
icons.data.svg.css, along with the other two style sheets and the png folder should be added to your CSS folder.
icons.data.png.css is the style sheet the script will load in browsers that don’t support SVG, such as IE8. Fallback for the inline SVG is provided as a base64-encoded PNG. For instance, the fallback for the Twitter icon from our example would look like so:
.twitter-icon{
    background-image: url('data:image/png;base64;…’);
    /* etc. */
}
icons.fallback.css is the style sheet required for browsers that don’t support base64-encoded PNGs – the PNG images are loaded as usual using the image’s URL. The script will load this style sheet for IE6 and IE7, for example.
.twitter-icon{
    background-image: url(png/twitter-icon.png);
    /* etc. */
}
This technique is very different from the previous one. The sprite in this case is literally the style sheet, not an SVG container, and the icon usage is very similar to that of a CSS sprite – the icons are provided as background images.
This technique has advantages and disadvantages. For the sake of brevity, I won’t go into further details, but the main limitations worth mentioning are that SVGs embedded as background images cannot be styled with CSS; and animations are restricted to those defined inside the <svg> for each icon. CSS interactions (such as hover effects) don’t work either. Thus, to apply an effect for an icon that changes its color on hover, for example, you’ll need to export a set of SVGs for each colour in order for Grumpicon to create matching fallback PNG images that can then be used for the animation.
For more details about the Grumpicon workflow, I recommend you check out “A Designer’s Guide to Grumpicon” on Filament Group’s website.
Using SVG fragment identifiers and views
This spriting technique is, again, different from the previous ones, and it is my personal favourite.
SVG comes with a standard way of cropping to a specific area in a particular SVG image. If you’ve ever worked with CSS sprites before then this definitely sounds familiar: it’s almost exactly what we do with CSS sprites – the image containing all of the icons is cropped, so to speak, to show only the one icon that we want in the background positioning area of the element, using background size and positioning properties.
Instead of using background properties, we’ll be using SVG’s viewBox attribute to crop our SVG to the specific icon we want.
What I like about this technique is that it is more visual than the previous ones. Using this technique, the SVG sprite is treated like an actual image containing other images (the icons), instead of treating it as a piece of code containing other code.
Again, our SVG icons are placed inside a main SVG container that is going to be our SVG sprite. If you’re working in a graphics editor, position or arrange your icons inside the canvas any way you want them to be, and then export the graphic as is. Of course, the less empty space there is in your SVG, the better.
In our example, the sprite contains three icons as shown in the following image. The sprite is open in Sketch. Notice how the SVG is just big enough to fit the icons inside it. It doesn’t have to be like this, but it’s cleaner this way.
![]() Screenshot showing the SVG sprite containing our icons.
Screenshot showing the SVG sprite containing our icons.
Now, suppose you want to display only the Instagram icon. Using the SVG viewBox attribute, we can crop the SVG to the icon. The Instagram icon is positioned at 64px along the positive x-axis, and zero pixels along the y-axis. It is also 32px by 32px in size.
![]() Screenshot showing the position (offset) of the Instagram icon inside the SVG sprite, and its size.
Screenshot showing the position (offset) of the Instagram icon inside the SVG sprite, and its size.
Using this information, we can specify the value of the viewBox as: 64 0 32 32. This area of the view box contains only the Instagram icon. 64 0 specifies the top-left corner of the view box area, and 32 32 specify its dimensions.
Now, if we were to change the viewBox value on the SVG sprite to this value, only the Instagram icon will be visible inside the SVG viewport. Great. But how do we use this information to display the icon in our page using our sprite?
SVG comes with a native way to link to portions or areas of an image using fragment identifiers. Fragment identifiers are used to link into a particular view area of an SVG document. Thus, using a fragment identifier and the boundaries of the area that we want (from the viewBox), we can link to that area and display it.
For example, if you want to display the icon from the sprite using an <img> tag, you can reference the icon in the sprite like so:
<img src='uiIcons.svg#svgView(viewBox(64, 0, 32, 32))' alt="Settings icon"/>The fragment identifier in the snippet above (#svgView(viewBox(64, 0, 32, 32))) is the important part. This will result in only the Instagram icon’s area of the sprite being displayed.
There is also another way to do this, using the SVG <view> element. The <view> element can be used to define a view area and then reference that area somewhere else. For example, to define the view box containing the Instagram icon, we can do the following:
<view id='instagram-icon' viewBox='64 0 32 32' />Then, we can reference this view in our <img> element like this:
<img src='sprite.svg#instagram-icon' alt="Instagram icon" />The best part about this technique – besides the ability to reference an external SVG and hence make use of browser caching – is that it allows us to use practically any SVG embedding technique and does not restrict us to specific tags.
It goes without saying that this feature can be used for more than just icon systems, owing to viewBox’s power in controlling an SVG’s viewable area.
SVG fragment identifiers have decent browser support, but the technique is buggy in Safari: there is a bug that causes problems when loading a server SVG file and then using fragment identifiers with it. Bear Travis has documented the issue and a workaround.
Where to go from here
Pick the technique that works best for your project. Each technique has its own pros and cons, relating to convenience and maintainability, performance, and styling and scripting. Each technique also requires its own fallback mechanism.
The spriting techniques mentioned here are not the only techniques available. Other methods exist, such as SVG stacks, and others may surface in future, but these are the three main ones today.
The third technique using SVG’s built-in viewBox features is my favourite, and with better browser support and fewer (ideally, no) bugs, I believe it is more likely to become the standard way to create and use SVG sprites. Fallback techniques can be created, of course, in one of many possible ways.
Do you use SVG for your icon system? If so, which is your favourite technique? Do you know or have worked with other ways for creating SVG sprites?
About the author
Sara is a freelance front-end web developer from Lebanon — focusing on HTML5, SVG, CSS3 and Javascript. She loves teaching and enjoys breaking down complex subjects into simple, easy-to-understand bits. She writes articles and tutorials on front-end web development on her blog, and for various online magazines including Codrops, where she is an author and team member. She also actively tweets on Twitter at @SaraSoueidan.
Brought to you by
Related articles
-
Naming Things
Paul Lloyd perches his partridge in the CSS pear tree to discuss naming methodologies, ontologies and semantics. What’s in a name? That which we call a cherub by any other name would smell as sweet.
-
Make Your Mockup in Markup
Meagan Fisher tackles the issue of designing in the browser head on by looking at some of the practicalities of ditching Photoshop and setting your foundations markup. Sorry Photoshop, it’s not me, it’s you.
-
Rock Solid HTML Emails
David Greiner offers invaluable insight into building HTML emails. Just like HTML for the web, email requires an intimate understanding of the software used to view your work. Allow Dave to share from his wealth of experience.
-
Incite A Riot
Jeremy Keith issues a call to arms over how passages of dialogue are marked up in HTML, and more specifically, in HTML5. Stand firm, good designers and developers of the web, and don’t let poorly worded specs lead the people astray!
-
My Other Christmas Present Is a Definition List
Mark Norman Francis leaves no stone unturned in the quest for better markup. Today’s target is the humble, yet oft-abused definition list. Help the suffering stop this Christmas. With your help, the definition list can rebuild its life and learn to be happy again. We’re counting on you.
-
Marking Up a Tag Cloud
Mark Norman Francis looks at the increasingly ubiquitous tag cloud, and specifically how it can be marked up in HTML. It’s evidentially not a clear-cut issue, as everyone does it differently. What we need is some kind of markup junkie to weigh in with his suggested method. Oh, wait…


