Moo'y Christmas

A note from the editors: Moo has changed their API since this article was written.
As the web matures, it is less and less just about the virtual world. It is becoming entangled with our world and it is harder to tell what is virtual and what is real. There are several companies who are blurring this line and make the virtual just an extension of the physical. Moo is one such company.
Moo offers simple print on demand services. You can print business cards, moo mini cards, stickers, postcards and more. They give you the ability to upload your images, customize them, then have them sent to your door. Many companies allow this sort of digital to physical interaction, but Moo has taken it one step further and has built an API.
Printable stocking stuffers
The Moo API consists of a simple XML file that is sent to their servers. It describes all the information needed to dynamically assemble and print your object. This is very helpful, not just for when you want to print your own stickers, but when you want to offer them to your customers, friends, organization or community with no hassle. Moo handles the check-out and shipping, all you need to do is what you do best, create!
Now using an API sounds complicated, but it is actually very easy. I am going to walk you through the options so you can easily be printing in no time.
Before you can begin sending data to the Moo API, you need to register and get an API key. This is important, because it allows Moo to track usage and to credit you. To register, visit http://www.moo.com/api/ and click “Request an API key”.
In the following examples, I will use {YOUR API KEY HERE} as a place holder, replace that with your API key and everything will work fine.
First thing you need to do is to create an XML file to describe the check-out basket. Open any text-editor and start with some XML basics. Don’t worry, this is pretty simple and Moo gives you a few tools to check your XML for errors before you order.
<?xml version="1.0" encoding="UTF-8"?>
<moo xsi:noNamespaceSchemaLocation="http://www.moo.com/xsd/api_0.7.xsd" xmlns:xsi="http://www.w3.org/2001/XMLSchema-instance">
	 <request>
		 <version>0.7</version>
		 <api_key>{YOUR API KEY HERE}</api_key>
		 <call>build</call>
		 <return_to>http://www.example.com/return.html</return_to>
		 <fail_to>http://www.example.com/fail.html</fail_to>
	 </request>
	 <payload>
	 ...
	 </payload>
</moo>
Much like HTML’s <head> and <body>, Moo has created <request> and <payload> elements all wrapped in a <moo> element.
The <request> element contains a few pieces of information that is the same across all the API calls. The <version> element describes which version of the API is being used. This is more important for Moo than for you, so just stick with “0.7” for now.
The <api_key> allows Moo to track sales, referrers and credit your account.
The <call> element can only take “build” so that is pretty straight forward. The <return_to> and <fail_to> elements are URLs. These are optional and are the URLs the customer is redirected to if there is an error, or when the check out process is complete. This allows for some basic branding and a custom “thank you” page which is under your control. That’s it for the <request> element, pretty easy so far!
Next up is the <payload> element. What goes inside here describes what is to be printed. There are two possible elements, we can put <chooser> or we can put <products> directly inside <payload>. They work in a similar ways, but they drop the customer into different parts of the Moo checkout process.
If you specify <products> then you send the customer straight to the Moo payment process. If you specify <chooser> then you send the customer one-step earlier where they are allowed to pick and choose some images, remove the ones they don’t like, adjust the crop, etc. The example here will use <chooser> but with a little bit of homework you can easily adjust to <products> if you desire.
...
<chooser>
	 <product_type>sticker</product_type>
	 <images>
		 <url>http://example.com/images/christmas1.jpg</url>
	 </images>
</chooser>
...
Inside the <chooser> element, we can see there are two basic piece of information. The type of product we want to print, and the images that are to be printed. The <product_type> element can take one of five options and is required! The possibilities are: minicard, notecard, sticker, postcard or greetingcard. We’ll now look at two of these more closely.
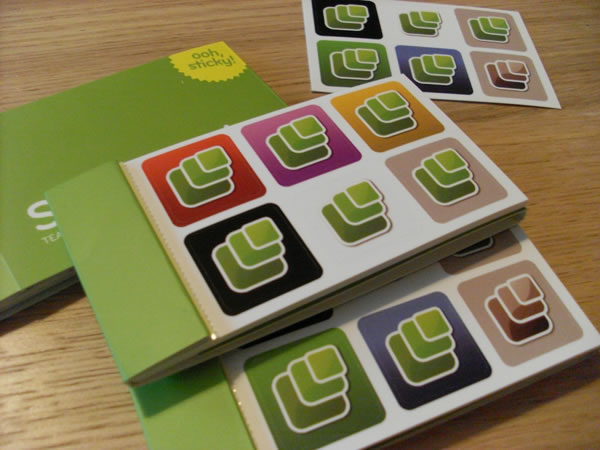
Moo Stickers
In the Moo sticker books you get 90 small squarish stickers in a small little booklet.
The simplest XML you could send would be something like the following payload:
...
<payload>
	<chooser>
		<product_type>sticker</product_type>
		<images>
			<url>http://example.com/image1.jpg</url>
		</images>
		<images>
			<url>http://example.com/image2.jpg</url>
		</images>
		<images>
			<url>http://example.com/image3.jpg</url>
		</images>
	</chooser>
</payload>
...
This creates a sticker book with only 3 unique images, but 30 copies of each image. The Sticker books always print 90 stickers in multiples of the images you uploaded. That example only has 3 <images> elements, but you can easily duplicate the XML and send up to 90. The <url> should be the full path to your image and the image needs to be a minimum of 300 pixels by 300 pixels.
You can add more XML to describe cropping, but the simplest option is to either, let your customers choose or to pre-crop all your images square so there are no issues.
The full XML you would post to the Moo API to print sticker books would look like this:
<?xml version="1.0" encoding="UTF-8"?>
<moo xsi:noNamespaceSchemaLocation="http://www.moo.com/xsd/api_0.7.xsd" xmlns:xsi="http://www.w3.org/2001/XMLSchema-instance">
	<request>
		<version>0.7</version>
		<api_key>{YOUR API KEY HERE}</api_key>
		<call>build</call>
		<return_to>http://www.example.com/return.html</return_to>
		<fail_to>http://www.example.com/fail.html</fail_to>
	</request>
	<payload>
		<chooser>
			<product_type>sticker</product_type>
			<images>
				<url>http://example.com/image1.jpg</url>
			</images>
			<images>
				<url>http://example.com/image2.jpg</url>
			</images>
			<images>
				<url>http://example.com/image3.jpg</url>
			</images>
		</chooser>
	</payload>
</moo>
Mini-cards
The mini-cards are the small cute business cards in 14×35 dimensions and come in packs of 100.
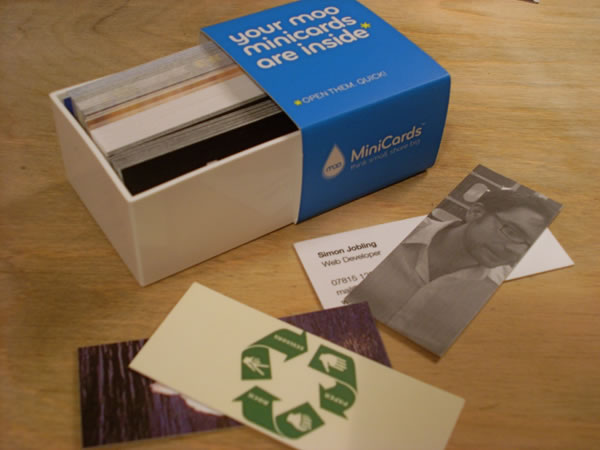
Since the mini-cards are print on demand, this allows you to have 100 unique images on the back of the cards.
Just like the stickers example, we need the same XML setup. The <moo> element and <request> elements will be the same as before. The part you will focus on is the <payload> section.
Since you are sending along specific information, we can’t use the <chooser> option any more. Switch this to <products> which has a child of <product>, which in turn has a <product_type> and <designs>. This might seem like a lot of work, but once you have it set up you won’t need to change it.
...
<payload>
	<products>
		<product>
			<product_type>minicard</product_type>
			<designs>
				...
			</designs>
		</product>
	</products>
</payload>
...
So now that we have the basic framework, we can talk about the information specific to minicards. Inside the <designs> element, you will have one <design> for each card. Much like before, this contains a way to describe the image. Note that this time the element is called <image>, not images plural.
Inside the <image> element you have a <url> which points to where the image lives and a <type>. The <type> should just be set to ‘variable’. You can pass crop information here instead, but we’re going to keep it simple for this tutorial. If you are interested in how that works, you should refer to the official API documentation.
...
<design>
	<image>
		<url>http://example.com/image1.jpg</url>
		<type>variable</type>
	</image>
</design>
...
So far, we have managed to build a pack of 100 Moo mini-cards with the same image on the front. If you wanted 100 different images, you just need to replicate this snippit, 99 more times.
That describes the front design, but the flip-side of your mini-cards can contain 6 lines of text, which is customizable in a variety of colors, fonts and styles.
The API allows you to create different text on the back of each mini-card, something the web interface doesn’t implement. To describe the text on the mini-card we need to add a <text_collection> element inside the <design> element. If you skip this element, the back of your mini-card will just be blank, but that’s not very festive!
Inside the <text_collection> element, we need to describe the type of text we want to format, so we add a <minicard> element, which in turn contains all the lines of text. Each of Moo’s printed products take different numbers of lines of text, so if you are not planning on making mini-cards, be sure to consult the documentation.
For mini-cards, we can have 6 distinct lines, each with their own style and layout. Each line is represented by an element <text_line> which has several optional children. The <id> tells which line of the 6 to print the text one. The <string> is the text you want to print and it must be shorter than 38 characters. The <bold> element is false by default, but if you want your text bolded, then add this and set it to true.
The <align> element is also optional. By default it is set to align left. You can also set this to right or center if you desirer. The <font> element takes one of 3 types, modern, traditional or typewriter. The default is modern. Finally, you can set the <colour>, yes that’s color with a ‘u’, Moo is a British company, so they get to make the rules. When you start a print on demand company, you can spell it however you want. The <colour> element takes a 6 character hex value with a leading #.
<design>
	...
	<text_collection>
		<minicard>
			<text_line>
				<id>(1-6)</id>
				<string>String, I must be less than 38 chars!</string>
				<bold>true</bold>
				<align>left</align>
				<font>modern</font>
				<colour>#ff0000</colour>
			</text_line>
		</minicard>
	</text_collection>
</design>
If you combine all of this into a mini-card request you’d get this example:
<?xml version="1.0" encoding="UTF-8"?>
<moo xsi:noNamespaceSchemaLocation="http://www.moo.com/xsd/api_0.7.xsd" xmlns:xsi="http://www.w3.org/2001/XMLSchema-instance">
	<request>
		<version>0.7</version>
		<api_key>{YOUR API KEY HERE}</api_key>
		<call>build</call>
		<return_to>http://www.example.com/return.html</return_to>
		<fail_to>http://www.example.com/fail.html</fail_to>
	</request>
	<payload>
		<products>
			<product>
				<product_type>minicard</product_type>
				<designs>
					<design>
						<image>
							<url>http://example.com/image1.jpg</url>
							<type>variable</type>
						</image>
						<text_collection>
							<minicard>
								<text_line>
								<id>1</id>
								<string>String, I must be less than 38 chars!</string>
								<bold>true</bold>
								<align>left</align>
								<font>modern</font>
								<colour>#ff0000</colour>
								</text_line>
							</minicard>
						</text_collection>
					</design>
				</designs>
			</product>
		</products>
	</payload>
</moo>
Now you know how to construct the XML that describes what to print. Next, you need to know how to send it to Moo to make it happen!
Posting to the API
So your XML is file ready to go. First thing we need to do is check it to make sure it’s valid. Moo has created a simple validator where you paste in your XML, and it alerts you to problems.
When you have a fully valid XML file, you’ll want to send that to the Moo API. There are a few ways to do this, but the simplest is with an HTML form.
This is the sample code for an HTML form with a big “Buy My Stickers” button. Once you know that it is working, you can use all your existing HTML knowledge to style it up any way you like.
<form method="POST" action="http://www.moo.com/api/api.php">
	<input type="hidden" name="xml" value="<?xml version="1.0" encoding="UTF-8"?> <moo xsi:noNamespaceSchemaLocation="http://www.moo.com/xsd/api_0.7.xsd" xmlns:xsi="http://www.w3.org/2001/XMLSchema-instance"> <request>....</request> <payload>...</payload> </moo> ">
	<input type="submit" name="submit" value="Buy My Stickers"/>
</form>
This is just a basic <form> element that submits to the Moo API, http://www.moo.com/api/api.php, when someone clicks the button. There is a hidden input called “xml” which contains the value the XML file we created previously.
For those of you who need to “view source” to fully understand what’s happening can see a working version and peek under the hood.
Using the API has advantages over uploading the images directly yourself. The images and text that you send via the API can be dynamic. Some companies, like Dopplr, have taken user profiles and dynamic data that changes every minute to generate customer stickers of places that you’ve travelled to or mini-cards with a world map of all the cities you have visited. Every single customer has different travel plans and therefore different sets of stickers and mini-card maps. The API allows for the utmost current information to be printed, on demand, in real-time.
Go forth and Moo’ltiply
See, making an API call wasn’t that hard was it? You are now 90% of the way to creating anything with the Moo API. With a bit of reading, you can learn that extra 10% and print any Moo product. Be on the lookout in 2009 for the official release of the 1.0 API with improvements and some extras that were not available when this article was written.
This article is released under the creative-commons attribution share-a-like license. That means you are free to re-distribute it, mash it up, translate it and otherwise re-using it ways the author never considered, in return he only asks you mention his name.

This work by Brian Suda is licensed under a Creative Commons Attribution-Share Alike 3.0 Unported License.
About the author
Brian Suda is a master informatician working to make the web a better place little by little everyday. Since discovering the Internet in the mid-90s, Brian Suda has spent a good portion of each day connected to it. His own little patch of Internet is http://suda.co.uk, where many of his past projects and crazy ideas can be found.
Photo: Jeremy Keith
Brought to you by
Related articles
-
Building a Dictaphone Using Media Recorder and getUserMedia
Chris Mills brushes up his shorthand and shows how the MediaStream Recording API in modern browsers can be used to capture audio directly from the user’s device. Inching ever closer to the capabilities of native software, it truly is an exciting time to be a web developer.
-
Develop Your Naturalist Superpowers with Observable Notebooks and iNaturalist
Natalie Downe gathers the forest creatures in from the cold and shows them how some clever combining of an inquisitive mind and a JavaScript API can produce some amazing results.
-
Fast Autocomplete Search for Your Website
Simon Willison searches for the true meaning of Christmas, but settles on making a search engine for our articles on 24 ways. In doing he so demonstrates how a little bit of JavaScript, some open source tools and a sprinkling of database magic can make your festive dreams come true.
-
Documentation-Driven Design for APIs
Frances Berriman puts the sled firmly behind the reindeer with her approach to documenting feature-rich APIs. Creating good documentation needn’t be a chore and it reaps benefits – you wouldn’t expect presents at Christmas without writing your list to Santa first, would you?
-
The Web Is Your CMS
Christian Heilmann uses the Yahoo! Query Language to assert that we already have a content management system in the form of the web. YQL unifies interfaces and combines requests to make working with APIs much easier.
-
Geotag Everywhere with Fire Eagle
Ben Ward walks us through the process of building a small client-side application using the Fire Eagle API. Yahoo’s Fire Eagle is a service for disseminating details of your location physical location to other services on the web. Ben shows us how such a thing can be made useful.