HTML5 Video Bumpers

Video is a bigger part of the web experience than ever before. With native browser support for HTML5 video elements freeing us from the tyranny of plugins, and the availability of faster internet connections to the workplace, home and mobile networks, it’s now pretty straightforward to publish video in a way that can be consumed in all sorts of ways on all sorts of different web devices.
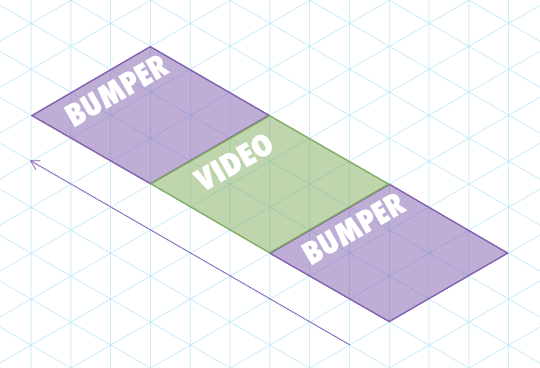
I recently worked on a project where the client had shot some dedicated video shorts to publish on their site. They also had some five-second motion graphics produced to top and tail the videos with context and branding. This pretty common requirement is a great idea on the web, where a user might land at your video having followed a link and be viewing a page without much context.
Known as bumpers, these short introduction clips help brand a video and make it look a lot more professional.
Adding bumpers to a video
The simplest way to add bumpers to a video would be to edit them on to the start and end of the video file itself. Cooking the bumpers into the video file is easy, but should you ever want to update them it can become a real headache. If the branding needs updating, for example, you’d need to re-edit and re-encode all your videos. Not a fun task.
What if the bumpers could be added dynamically? That would enable you to use the same bumper for multiple videos (decreasing download time for users who might watch more than one) and to update the bumpers whenever you wanted. You could change them seasonally, update them for special promotions, run different advertising slots, perform multivariate testing, or even target different bumpers to different users.
The trade-off, of course, is that if you dynamically add your bumpers, there’s a chance that a user in a given circumstance might not see the bumper. For example, if the main video feature was uploaded to YouTube, you’d have no way to control the playback. As always, you need to weigh up the pros and cons and make your choice.
HTML5 bumpers
If you wanted to dynamically add bumpers to your HTML5 video, how would you go about it? That was the question I found myself needing to answer for this particular client project.
My initial thought was to treat it just like an image slideshow. If I were building a slideshow that moved between images, I’d use CSS absolute positioning with z-index to stack the images up on top of each other in a pile, with the first image on top. To transition to the second image, I’d use JavaScript to fade the top image out, revealing the second image beneath it.
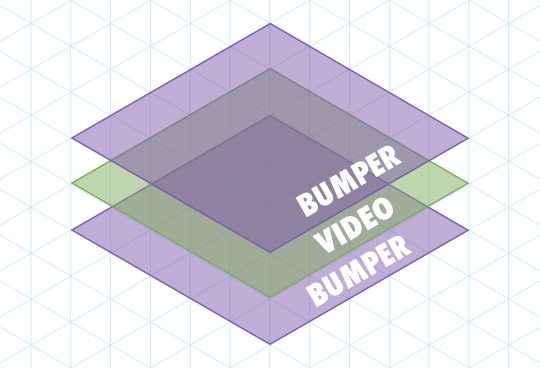
Now that video is just a native object in the DOM, just like an image, why not do the same? Stack the videos up with the opening bumper on top, listen for the video’s onended event, and fade it out to reveal the main feature behind. Good idea, right?
Wrong
Remember that this is the web. It’s never going to be that easy. The problem here is that many non-desktop devices use native, dedicated video players. Think about watching a video on a mobile phone – when you play the video, the phone often goes full-screen in its native player, leaving the web page behind. There’s no opportunity to fade or switch z-index, as the video isn’t being viewed in the page. Your page is left powerless. Powerless!
So what can we do? What can we control?
Those of us with particularly long memories might recall a time before CSS, when we’d have to use JavaScript to perform image rollovers. As CSS background images weren’t a practical reality, we would use lots of <img> elements, and perform a rollover by modifying the src attribute of the image.
Turns out, this old trick of modifying the source can help us out with video, too. In most cases, modifying the src attribute of a <video> element, or perhaps more likely the src attribute of a source element, will swap from one video to another.
Swappin’ it
Let’s take a deliberately simple example of a super-basic video tag:
<video src="mycat.webm" controls>no fallback coz i is lame, innit.</video>We could very simply write a script to find all video tags and give them a new src to show our bumper.
<script>
	var videos, i, l;
	videos = document.getElementsByTagName('video');
	for(i=0, l=videos.length; i<l; i++) {
		videos[i].setAttribute('src', 'bumper-in.webm');
	}
</script>
View the example in a browser with WebM support. You’ll see that the video is swapped out for the opening bumper. Great!
Beefing it up
Of course, we can’t just publish video in one format. In practical use, you need a <video> element with multiple <source> elements containing your different source formats.
<video controls>
    <source src="mycat.mp4" type="video/mp4" />
    <source src="mycat.webm" type="video/webm" />
    <source src="mycat.ogv" type="video/ogg" />
</video>
This time, our script needs to loop through the sources, not the videos. We’ll use a regular expression replacement to swap out the file name while maintaining the correct file extension.
<script>
    var sources, i, l, orig;
    sources = document.getElementsByTagName('source');
    for(i=0, l=sources.length; i<l; i++) {
        orig = sources[i].getAttribute('src');
        sources[i].setAttribute('src', orig.replace(/(w+).(w+)/, 'bumper-in.$2'));
        // reload the video
        sources[i].parentNode.load();
    }
</script>
The difference this time is that when changing the src of a <source> we need to call the .load() method on the video to get it to acknowledge the change.
See the code in action, this time in a wider range of browsers.
But, my video!
I guess we should get the original video playing again. Keeping the same markup, we need to modify the script to do two things:
- Store the original
srcin adata-attribute so we can access it later - Add an event listener so we can detect the end of the bumper playing, and load the original video back in
As we need to loop through the videos this time to add the event listener, I’ve moved the .load() call into that loop. It’s a bit more efficient to call it only once after modifying all the video’s sources.
<script>
var videos, sources, i, l, orig;
sources = document.getElementsByTagName('source');
for(i=0, l=sources.length; i<l; i++) {
orig = sources[i].getAttribute('src');
sources[i].setAttribute('data-orig', orig);
sources[i].setAttribute('src', orig.replace(/(w+).(w+)/, 'bumper-in.$2'));
}
videos = document.getElementsByTagName('video');
for(i=0, l=videos.length; i<l; i++) {
videos[i].load();
videos[i].addEventListener('ended', function(){
sources = this.getElementsByTagName('source');
for(i=0, l=sources.length; i<l; i++) {
orig = sources[i].getAttribute('data-orig');
if (orig) {
sources[i].setAttribute('src', orig);
}
sources[i].setAttribute('data-orig','');
}
this.load();
this.play();
});
}
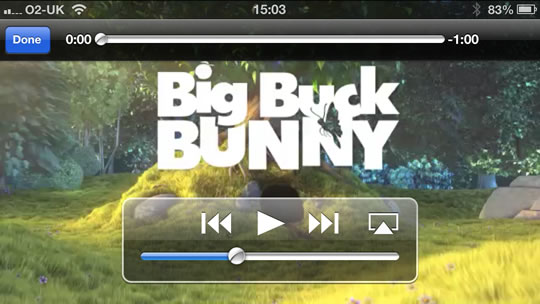
</script>Again, view the example to see the bumper play, followed by our spectacular main feature. (That’s my cat, Widget. His interests include sleeping and internet marketing.)
Tidying things up
The final thing to do is add our closing bumper after the main video has played. This involves the following changes:
- We need to keep track of whether the
srchas been changed, so we only play the video if it’s changed. I’ve added themodifiedvariable to track this, and it stops us getting into a situation where the video just loops forever. - Add an
elseto the event listener, for when theorigis false (so the main feature has been playing) to load in the end bumper. We also check that we’re not already playing the end bumper. Because looping.
<script>
var videos, sources, i, l, orig, current, modified;
sources = document.getElementsByTagName('source');
for(i=0, l=sources.length; i<l; i++) {
   orig = sources[i].getAttribute('src');
   sources[i].setAttribute('data-orig', orig);
   sources[i].setAttribute('src', orig.replace(/(w+).(w+)/, 'bumper-in.$2'));
}
videos = document.getElementsByTagName('video');
for(i=0, l=videos.length; i<l; i++) {
   videos[i].load();
   modified = false;
   videos[i].addEventListener('ended', function(){
      sources = this.getElementsByTagName('source');
      for(i=0, l=sources.length; i<l; i++) {
         orig = sources[i].getAttribute('data-orig');
         if (orig) {
            sources[i].setAttribute('src', orig);
            modified = true;
         }else{
            current = sources[i].getAttribute('src');
            if (current.indexOf('bumper-out')==-1) {
               sources[i].setAttribute('src', current.replace(/([w]+).(w+)/, 'bumper-out.$2'));
               modified = true;
            }else{
               this.pause();
               modified = false;
            }
         }
         sources[i].setAttribute('data-orig','');
      }
      if (modified) {
         this.load();
         this.play();
      }
   });
}
</script>
Yo ho ho, that’s a lot of JavaScript. See it in action – you should get a bumper, the cat video, and an end bumper.
Of course, this code works fine for demonstrating the principle, but it’s very procedural. Nothing wrong with that, but to do something similar in production, you’d probably want to make the code more modular to ease maintainability. Besides, you may want to use a framework, rather than basic JavaScript.
The end credits
One really important principle here is that of progressive enhancement. If the browser doesn’t support JavaScript, the user won’t see your bumper, but they will get the main video. If the browser supports JavaScript but doesn’t allow you to modify the src (as was the case with older versions of iOS), the user won’t see your bumper, but they will get the main video.
If a search engine or social media bot grabs your page and looks for content, they won’t see your bumper, but they will get the main video – which is absolutely what you want.
This means that if the bumper is absolutely crucial, you may still need to cook it into the video. However, for many applications, running it dynamically can work quite well.
As always, it comes down to three things:
- Measure your audience: know how people access your site
- Test the solution: make sure it works for your audience
- Plan for failure: it’s the web and that’s how things work ‘round these parts
But most of all play around with it, have fun and build something awesome.
About the author
Drew McLellan is a developer and content management consultant from Bristol, England. He’s the lead developer for the popular Perch and Perch Runway content management systems, and public speaking portfolio site Notist. Drew was formerly Group Lead at the Web Standards Project, and a Search Innovation engineer at Yahoo!. When not publishing 24 ways, he keeps a personal site about web development, takes photos, tweets a lot and tries to stay upright on his bicycle.
Brought to you by
Related articles
-
Designing Your Site Like It’s 1998
Andy Clarke tells a tale as old as time, a tale of tables, framesets, fixed widths and spacer GIFs (ask your parents). Harking back to the methods that were appropriate to used to build cutting-edge websites twenty years ago, not only can we see how far we’ve come but can be excited for what lies ahead.
-
Feeding the Audio Graph
Ben Foxall dives deep into the Web Audio API to serve up such well known Christmas hits as I’m Dreaming Of A White Noise Generator, and All I Want For Christmas Is 440Hz. Get ready to dance around your browser this season, because it certainly won’t be a silent night.
-
Speed Up Your Site with Delayed Content
Paul Hammond injects some pace into page rendering with a nifty idea to allow the most important content to take precedence over your site’s more decorative baubles. What’s Christmas without the anticipation?
-
Real Animation Using JavaScript, CSS3, and HTML5 Video
Dan Mall breathes life into web standards-based animation. By striving for more than just mechanical movement, we can create more believable animated effects to enhance our users’ experience.
-
“Probably, Maybe, No”: The State of HTML5 Audio
Scott Schiller sounds out the possibilities of HTML5 audio, listening carefully to arguments about competing formats and the quirks in current implementations. When will we hear the sleigh bells in the snow on your website?
-
Wrapping Things Nicely with HTML5 Local Storage
Christian Heilmann unwraps local storage, one of HTML5’s very useful new features. Speed up web services and cache frequently accessed data or even an application’s whole interface – local storage isn’t just for Christmas.